OneWireViewer和iButton?快速使用
Introduction
Maxim's iButton products are designed so that a personal computer (PC) can easily read from or write to an iButton device. The OneWireViewer is a convenient demonstration software program that allows users to easily read from and write to iButtons with a Windows-based PC that has a USB port. (The Getting Started section discusses limitations when writing to EPROM-based iButtons.) The PC must also support Sun Microsystems' Java? program.
The OneWireViewer requires additional software drivers to allow the PC to communicate with the adapter. Both OneWireViewer and the required 1-Wire? drivers are bundled together and available for free download.
The OneWireViewer and 1-Wire drivers work with Windows XP? (SP2 or higher), Windows Vista?, and the Microsoft server operating system, Windows 2008. This application note gives detailed installation instructions for PCs using Windows Vista or Windows XP operating systems.
Getting Started
To communicate with your iButton, you need all of the items shown in Figure 1.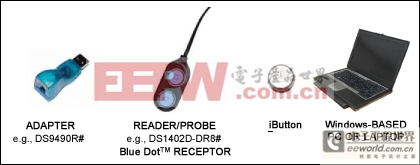
Figure 1. Required setup components.
Maxim? provides two iButton kits that include the adapter, reader, and iButtons for evaluation:
- DS1921K#—iButton Temperature Logger Starter Kit
- DS9092K#—iButton Starter Kit
All the components required for iButton evaluation are included in the kits. However, if the end application requires production quantities, then the adapters and reader/probes can be purchased separately by their individual part numbers. The DS9490R# adapter plugs into your PC's USB port. Most users find the adapter and the reader/probe in the starter kits useful for their evaluation and end use. Maxim sells other adapters separately for applications that require a serial-port interface instead of USB. To view other available adapters, go to our Adapters page.
Important Note: If you intend to program EPROM-based iButtons (DS1982, DS1985, or DS1986), you must use a serial-port adapter: the DS9097U-E25 with an external 12V power supply. This adapter has a 25-pin serial connector and requires a 9-pin to 25-pin serial converter to work with most PCs. The USB adapter can read these EPROM devices, but not program them.
The reader/probe has an RJ-11 modular connector that plugs into the adapter. Most users find the DS1402D-DR8# network cable useful for evaluation purposes. Maxim offers other alternate versions here.
All iButton devices communicate using the 1-Wire protocol. For designers doing printed circuit board design, 1-Wire devices in plastic packages may be more suitable than the iButton form factor. To evaluate 1-Wire plastic packaged devices, use the DS9090K 1-Wire Device Evaluation (EV) Kit.
Step 1. Java Installation
Many PCs have Java software installed at the factory. The OneWireViewer requires Java (version 5, update 8 or higher). To check if you have Java installed or what version you have, go to the Java website. Click on the appropriate links that autodetect and verify the version of Java installed on your PC. If your version is out of date, follow the links to download and install the latest version.
Step 2. Download Bundled OneWireViewer and 1-Wire Drivers
NOTE: DO NOT INSERT THE DS9490R# USB ADAPTER INTO THE PC YET. THIS SHOULD NOT BE DONE UNTIL STEP 4, AND WILL USUALLY CAUSE INSTALLATION PROBLEMS IF DONE BEFORE STEP 4.
Download the bundled OneWireViewer and 1-Wire drivers here. These pages have pulldown menus to help select the correct file for the operating system that you are running. Microsoft operating systems come in 32-bit and 64-bit versions. If you are not certain which version you have, the download page has a link to an applet that autodetects the correct version. Click on the hyperlink for the text, "Is my computer running a 32-bit or 64-bit operating system?" to run this autodetect applet.
Step 3. Install Bundled OneWireViewer and 1-Wire Drivers
After clicking on the download button, click Run on the window that asks, "Do you want to run or save this file?" See Figure 2.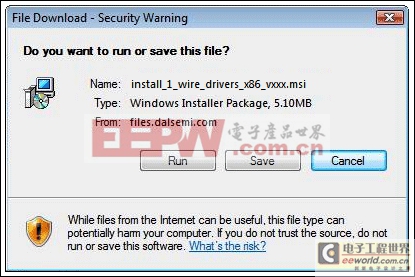
Figure 2. Download window.
After clicking Run, the window in Figure 3 will appear. If you want to run this software, click Run.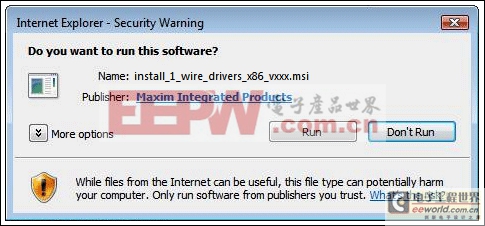
Figure 3. Window for running the installation software.
After this, you will be prompted to affirm the license agreement if you choose to use the 1-Wire drivers and the OneWireViewer software. After you affirm the license agreement, you will see another window that shows the progress of the installation. After installation completes, the final window shows a Finish button that, when clicked, completes the installation.
Step 4. Complete USB Installation
Now plug the DS9490R# USB adapter into your PC, as shown in Figure 4. Follow the Microsoft new-hardware wizard instructions to complete the plug-and-play portion of the installation.
Figure 4. Plugging the USB adapter into the PC.
This phase of the installation uses a Microsoft driver called WinUSB that allows the 1-Wire drivers to communicate through the USB port. Plugging in the USB adapter triggers a Microsoft plug-and-play event that links WinUSB properly to the 1-Wire drivers. Remember: If you try to plug in the USB adapter before Step 3 is complete, the plug-and-play action will not be able to link WinUSB to the 1-Wire drivers correctly.
In Windows Vista, the plug-and-play installation window (Figures 5 and 6) will appear. (See Figures 7 and 8 for the installation with Windows XP.):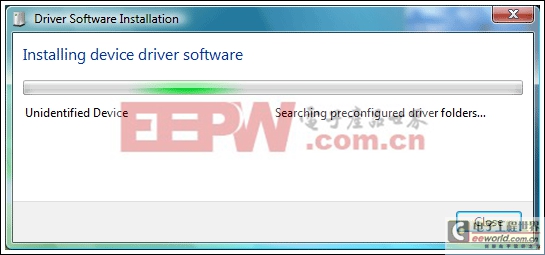
Figure 5. Windows Vista plug-and-play installation window.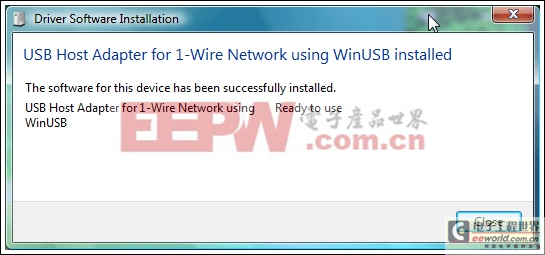
Figure 6. Windows Vista completion of plug-and-play installation.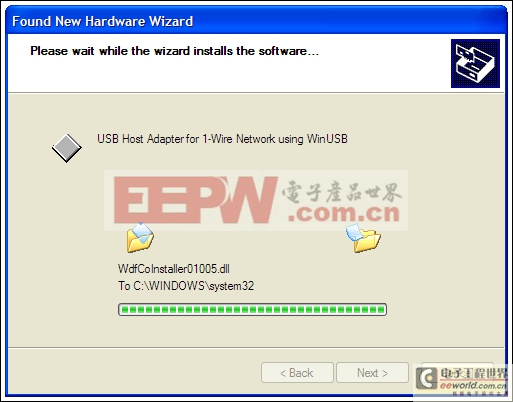
Figure 7. Windows XP plug-and-play installation window.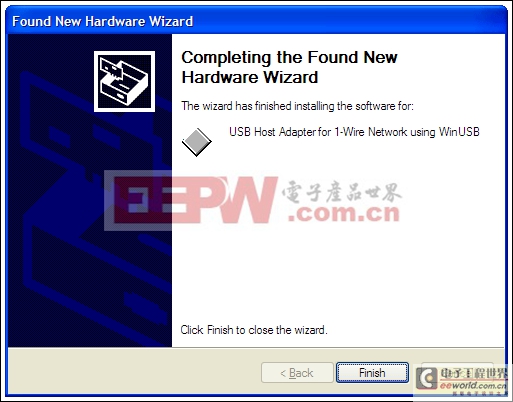
Figure 8. Windows XP completion of plug-and-play installation.
Step 5. Start the OneWireViewer Program
Follow these steps to launch the OneWireViewer from Windows Vista or Windows XP:
- Click on the Windows icon for Windows Vista or the Start button for Windows XP (usually lower left corner of the screen).
- Select All Programs.
- Click on the "1-Wire Drivers x86" folder.
- Click on OneWireViewer.exe.
Step 6. Connect the iButton and the Reader
Next, snap the iButton into one of the blue dots on the reader (Figure 9) and plug the reader into the adapter (Figure 10). The 1-Wire communication protocol can read multiple devices on the network at the same time. So if you have two iButtons, you can plug them into both blue dots on the reader. The unique 64-bit ID will appear in the OneWireViewer window for each iButton as it is snapped into the blue dot.
Figure 9. Connect an iButton to the reader by snapping it into place.
Figure 10. Connect the reader to the adapter.
Step 7. Run the OneWireViewer
The OneWireViewer can communicate with all versions of iButtons, including Hygrochron? and Thermochron? temperature loggers, memory iButtons, and simple identification iButtons. Each iButton type serves a different purpose, so for detailed information on how to use OneWireViewer for each application, see application note 3358, "OneWireViewer User's Guide."
The OneWireViewer program is open source, so software developers can use this as a foundation to develop their own applications. See our page with Software Development Kits for information on our open source code examples.
Additionally, Maxim has many partners who have written software tailored for specific iButton applications. To search for partners who offer iButton software and system solutions, see our Solutions Search database.
Problem Solving
If you encounter problems getting the OneWireViewer to work, please file a support request using our Tech Support form. An Application Engineer will attempt to address your problem within one business day.




評(píng)論